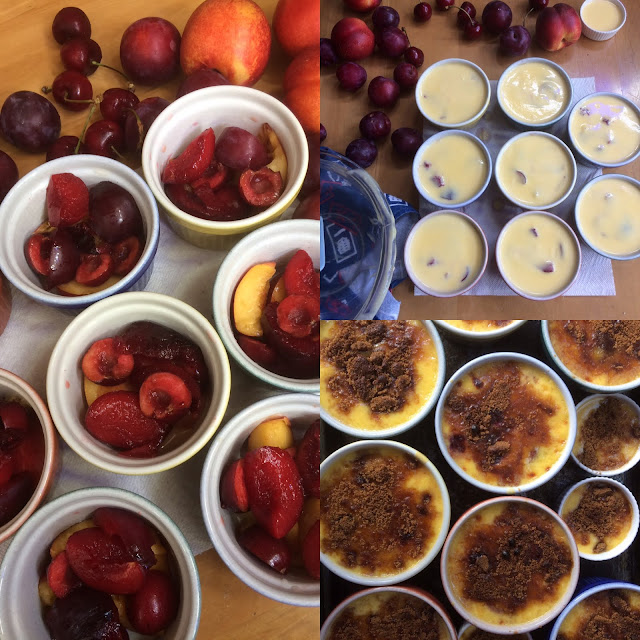
The original recipes comes from my book Sweet As... , my own recipe which doesn't require steam baking in the oven and includes nectarine slices. Plum slices and cherries were also added here, and the result was delicious! In Italy we also call this crema bruciata, but crème brûlée is most commonly used now as it sounds sophisticated :-).

To make the crème you will need one egg yolk for each 100ml of cream and 1 tbsp of sugar, for this recipes I used 5 egg yolks (thus 500ml cream and 5 tbsp of sugar) and I filled 8 ramekins, plus I had a little left to fill three miniature ones. Of course if you don't put any fruit on the bottom you will need more crème.
It is up to you how much fruit you put in, generally I just line the bottom of the ramekins with 4-5 think slices, this time I think I overdid it (thus the leftover crème) sicne stone fruit season is not long in NZ, and I wanted to use more fruit than crème! Don't use watery fruit and remove any juice from from cutting: you don't want to have a soggy base!
For the crème you need to mix well the egg yolks with sugar, then add the cream and either some vanilla seeds scraped from a vanilla pod, or a few drops of pure vanilla essence. If using vanilla essence add it when the crème is thick. A whole pod of vanilla is good too, but I find it to be in the way while stirring the crème!
Put the bowl with the mixture over a saucepan of boiling water and cook at bain-marie stirring constantly. It will take a long time, at least 30 minutes, possibly more, and your wrist will get tired and you will get bored. You can read a book at the same time, as long as you are careful. When you cannot take it any longer the cream will magically thicken, and when it is thick enough (remember that it will need to set in the fridge, not in the oven) and it looks bright yellow, remove from the heat and let it cool down lightly, always stirring.
Then pour over your fruit (or into the ramekins if you don't have any fruit). Refrigerate for at least 6 hours, better overnight, or a whole day. One hour before serving spread some brown or sugar over the top and caramelize under the grill, or with a blow-torch. At this stage I realized that I got rid of my old oven upstairs, the one that I never used since moving the kitchen downstairs 16 years ago except for the grill, and crème brûlée. The grill in the downstair kitchen is not as good, the oven is too big and it takes too long, still, I managed to melt the sugar (mostly).
Then refrigerate again for one hour and serve. The top should be crunchy and the centre smooth. It will be more creamy than the standard crème brûlée puddings that we find in restaurants, which have more of a 'set' texture, but if the crème is far too runny it means that you didn't cook it long enough at bain-marie, so you will know next time :-). If the top is not crunchy it means that you have left it in the fridge too long after caramelizing the sugar.
Mine was yummy and delicious, although thinking back at the grilling part (and seeing the details in the photos) I think that is it time for me to get a blow-torch. I never had one, it should be fun!
And the miniature ones? Well, they were so pretty next time I am just going to make a tray of them!
And now for the flowers of the day, all from my garden!
Photos and Recipes by Alessandra Zecchini ©


Comments
Post a Comment