This vegan bacon recipe can be life-changing for those former bacon lovers and for new vegans. This is the best recipe so far, considering also that it looks like the real thing in quite a spooky way (with those white stripes and all), and requires just a few easy to find ingredients.

The first 'secret' ingredient (and this is my first very own input) is sun-dried (or semi dried) tomatoes, which I soaked in a little hot water for 5 minutes. Then I added a tsp of smoked paprika, 1 tbsp of Japanese soy sauce, 2 tbsp of extra virgin olive oil, half tsp of salt and a little aquafaba (water from a can of chickpeas). I blended everything into a paste (using the nutribullet). The resulting paste should have the consistency of a spread, so add more aquafaba if it is too thick. Don't make it runny.

Now for the second main ingredient (and here I got the idea from my friend Lucia who has a vegan bacon recipe here): rice paper. I found this to be such a cool idea, plus it is an alternative to gluten meat or tofu. I had a quick look at all the other rice paper bacon (also called vacon) recipes around the internet and I tried a few ways to combine the rice paper with the paste to assemble the 'bacon' slices, but somehow I didn't quite like the idea of cutting the rice paper into strips, nor soaking them with the flavouring paste: they didn't fry well and the result was more like a burned crispy slice, rather than a juicy rasher with fatty white stripes. So I came up with a easy and less messy system, which produced the best results.

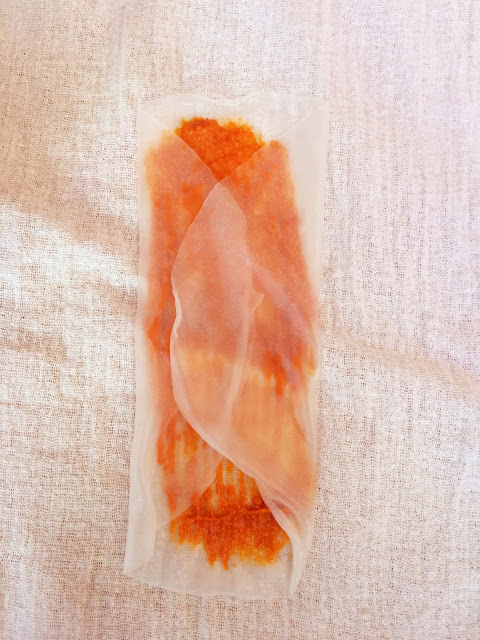
Soak the rice paper disks in hot water, just enough to soften them, and then place them on a clean gauze or kitchen towel. Brush the centre with the sun-dried tomato paste and then fold like shown in the photos.
Keep working making more slices until you run out of paste (or rice paper), well at this stage it looks a bit spooky, like real pieces of flesh... not quite something I would like to think about it, but for those who go for the realist look... here you are!
Now for the most challenging part: frying the vegan bacon: I used extra virgin olive oil and a skillet, wait for the oil to be hot and then add a few slices at the time, fold facing up first. You have to lift the slices delicately with two hands and lower them in the hot oil, so be careful.
The secret is not to overcook the slices: first they will bubble up a bit, and you want that, get some air in to keep them soft. As soon as you see the edges drying turn over the slices and fry the other side for even less time, otherwise the sun-dried tomato paste will burn. If the oil becomes too contaminated with burned paste you will need to change it.
Place the slices on a serving plate and eat immediately, since bacon is very fat I didn't bother patting the slices with kitchen paper, after all they are delicious also because they are greasy! For a variation you can use coconut oil instead of olive oil, and I want to try liquid smoke too, as soon as I get my hands on some.

The verdict: well, we all liked it! I thought that the best test was to have a bacon sandwich with some good bread and lettuce; my husband found it very realistic and the kids, who never tasted bacon so they could not compare, thought that it was simply really yum! It is also very filling so we had lots left over, I put them in the fridge and then quickly heated up a few slices in the skillet the day after for more sandwiches, and I did the same in the evening with the last slices chopped into small pieces, to make pasta carbonara (the second test). It worked really really well.
Photos and Recipes by Alessandra Zecchini ©


Comments
Post a Comment